Changing the cambelt is probably the most difficult part of servicing one of Morini’s modular v-twins. Paul Compton, Paul Morgan-Knight, Mark Bailey and Martin Gelder show how it’s done using high definition shed-o-vision video and greasy smudge photography…
The Moto Morini factory workshop manual, or the Blue Book as it’s more widely known, recommends changing the toothed rubber camshaft drive belt on the 125, 250, 350 and 500cc modular engined bikes every 5,000 miles or three years, whichever comes sooner. However, belt changing is not a job that many motorcyclists will be familiar with, and we suspect that most owners either get a dealer to do the belt swap for them, or simply ignore the job altogether.
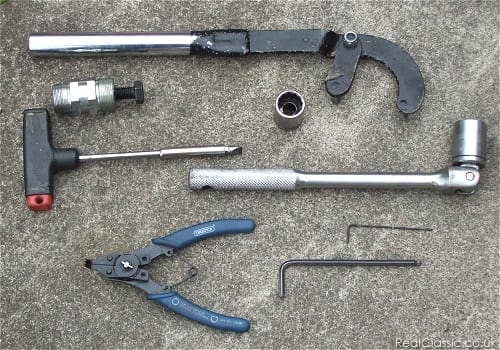
In fact, it’s a really straightforward procedure. The only special tool you’ll need is a flywheel puller, available from North Leicester Motorcycles or other dealers that carry parts for small Italian motorcycles. Having the flywheel holding tool helps but is not essential, and you’ll need a couple of sockets, a flat-bladed screwdriver and an Allen key or two.

Start by removing the right-hand side engine cover. In the still pictures we’re working on a non-electric start 350 Strada and an electric start 350K Sport.

This is the flywheel on the electric start 350K; as you can see the belt is behind the flywheel so that’s the first thing that has to come off.


The flywheel holder fits both models in the same way. It makes it easier to remove the centre nut using a well-fitting socket. Behind the nut is a spring washer that also has to come out. If it’s left in there’s a risk of stripping the threads when the puller is used. Use a small Allen key to hoik out the spring.

Before removing the flywheel, rotate the engine so that the dot on the cam pulley lines up with the mark on the crankcase.
The puller threads into the flywheel and then by screwing in the centre bolt the flywheel is pulled off its taper on the crankshaft. Make sure the centre bolt is wound out before screwing the puller all the way home and then progressively tighten the centre bolt until the flywheel pops off.
Video of flywheel removal
Removing the flywheel reveals the alternator stator, held on with three flat-head screws.

The manual recommends making reference mark on the stator plate and crankcases so that it can go back in exactly the same alignment.
With the stator out of the way you can remove the washer, spring, circlip and guide plate.

It’s then easy to ease the belt off a little at a time from the two pulleys.
Video of stator and belt removal
“Assembly is the reverse of disassembly”, as the saying goes.

When the new belt is fitted, check that the top pulley and crankcase mark are still lined up, and that the keyway is in line with the lower crankcase mark.
Video of new belt being fitted, flywheel being replaced
Make sure that all the washers, springs and circlips go back in the same order.

And don’t do what we did, and forget to refit the stator plate before bolting the flywheel back in place. Ahem.
Video of bike being tested. Job done. Brilliant.
————–


