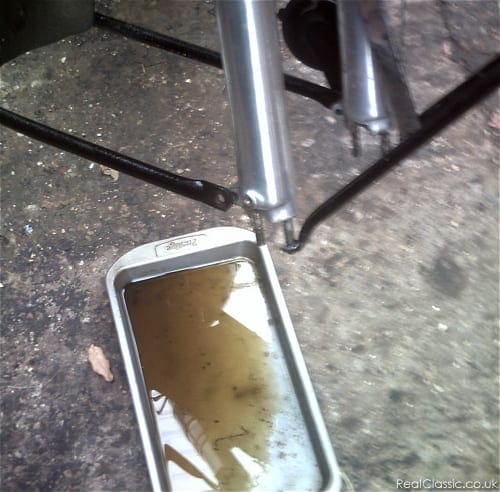
Neil Cairns didn’t have the correct special tool to hand when he replaced the fork seals on his AJS single. So he… improvised…
If you plan on keeping your old bike for a while and want to work on it yourself, then it seems sensible to build up a stock of the particular tools to suit that marque, model and actual machine. This isn’t wasted money because including them in the deal if you do decide to sell your classic will enhance its value and saleability. Special tools don’t have to be expensive but they do require a little bit of forethought. However, sometimes you just find yourself halfway through the job over a Bank Holiday weekend and without that vital tool to hand. Here’s how Neil coped with a similar situation:-
“In RealClassic 88 (August 2011) we saw FrankW using his expensive* ‘special tool’ to pull up the fork stanchions of his AJS front forks.
“I recently renewed the fork seals on my 1952 AJS 18S. It is a ’52 bike but it has ’55 forks fitted, which for the uninitiated means all the things are a bit bigger than the correct ’52 forks, like the stanchion size (1.25″ and not 1.125”) as well as the top nuts thread.
“I became aware that all was not well when I parked up at a VMCC meeting in August at their Shefford monthly meeting. We had just had a downpour of heavy rain and there was the usual rainbow of oily water under my engine. But there was also an oily rainbow ring around the front tyre…
“Subsequent investigation proved the fork seals were leaking, oil was oozing out from between the alloy leg at the chromed spring cover joint.
“Two seals set me back a mere £5 plus P&P from the AJS&MOC spares scheme (www.jampot.com)
“Removing the front wheel and mudguard is simple, as was the removal of the fork legs individually. Both required a big hammer used carefully to get the tubes through the clamped portion of the yokes after removing the allen screw, as there was a bit of rust gripping them. A good polish with emery paper restored the legs to a good finish and they slipped back into the yoke easily after swapping the worn seal for a new one (it is clamped between the chrome spring cover and the alloy leg).
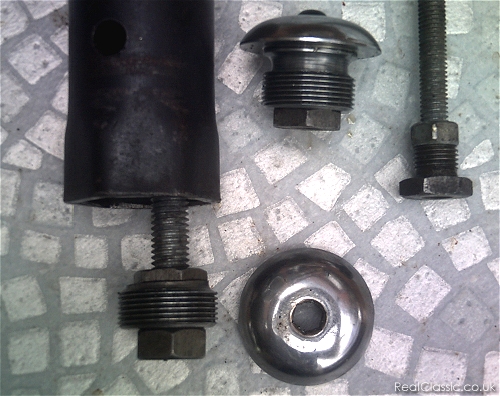
“Now we come to the hard bit. Getting the tube back up far enough so the top nut can be fitted. In FrankW’s photo in the magazine, he is using The Correct Tool. I have no Correct Tool. So I compromised. I cut an old top nut in half so I had just the threaded portion. This I clamped to a long bit of rolled-threaded bar (cheap, from the ironmongers years ago). I fitted the bar into the threaded bit of the tube and passed it all up through the yokes.
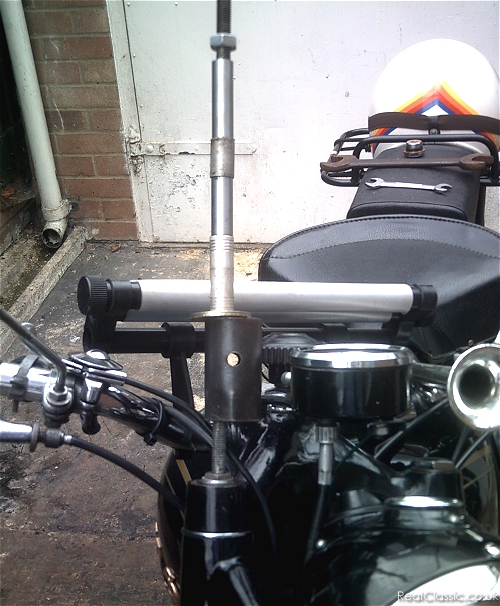
“Then I dropped a big box-spanner onto the top yoke, followed by a thick washer. This was so I could draw the tube right up into its top-yoke seating, a very hard thing to do without a ‘special tool’ as you start to compress the spring. A few spacers were added so the nut I was to use to pull it all up was well clear of the handlebars. This was done in minutes and the bottom yokes allen screw then clamped up tight.
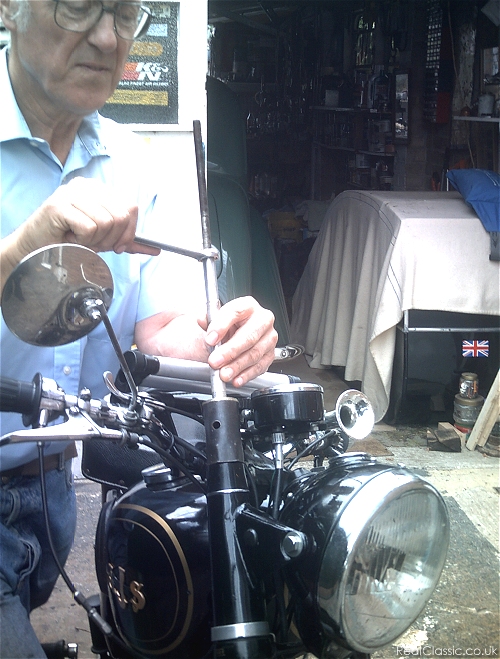
“Then I had to reclaim the inner rod which drops down into the tube when you remove the top nut. As I had cut up an old nut to get its thread, I then unscrewed the rod’s anchor from the thread and fitted it to another bar. This I fed down into the tube, twisted it until it caught the rod’s thread and then pulled it up to then screw into the top nut (loosening the allen screw for a second during this).
“Easy peasy. Total cost of tool: nil.”
————
|
*Actual cost of the proper tool is around £18 new
|
Matchlesses Right Now…… |
————–


